$this->bbcode_second_pass_quote('', '[')img]http://i30.tinypic.com/mm39mx.jpg[/img]
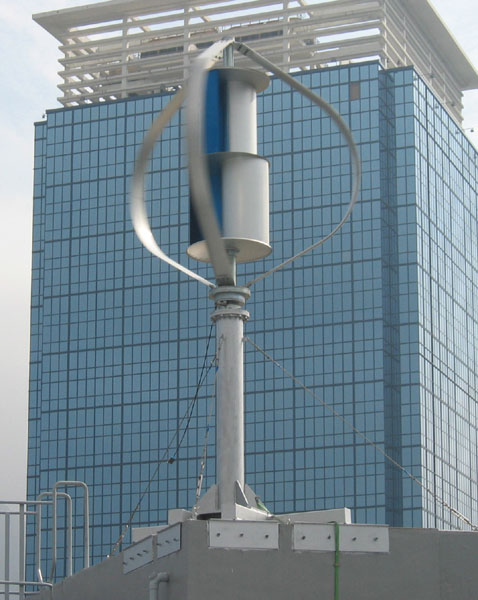
Mimicking the bumps on humpback-whale fins could lead to
more efficient wind turbines.
Marine scientists have long suspected that humpback whales'
incredible agility comes from the bumps on the leading edges of
their flippers. Now Harvard University researchers have come up
with a mathematical model that helps explain this hydrodynamic
edge. The work gives theoretical weight to a growing body of
empirical evidence that similar bumps could lead to more-stable
airplane designs, submarines with greater agility, and turbine
blades that can capture more energy from the wind and water.
...the turbines generate the same amount of power at 10 miles per
hour that conventional turbines generate at 17 miles per hour. The
tubercles effectively channel the air flow across the blades and
create swirling vortices that enhance lift.
...WhalePower has also shown in demonstrations that
tubercle-lined blades on industrial ceiling fans can operate 20
percent more efficiently than conventional blades can, and they do
a better job at circulating air flow in a building.
Whale-Inspired Windmills
http://www.technologyreview.com/Energy/20379/
http://peswiki.com/index.php/Directory:WhalePower_Corp


PeakOil is You
Copying Whales, 20% more efficient windmills?
Copying Whales, 20% more efficient windmills?
![]() by steam_cannon » Thu 06 Mar 2008, 12:26:47
by steam_cannon » Thu 06 Mar 2008, 12:26:47
I've been following this technology and it's recent developments
look promising. It looks this will have a whale of an influence on the
wind turbine industry and aviation...
Thoughts?
-

steam_cannon - Expert

- Posts: 2859
- Joined: Thu 28 Dec 2006, 04:00:00
- Location: MA
Re: Copying Whales, 20% more efficient windmills?
![]() by NTBKtrader » Thu 06 Mar 2008, 12:45:23
by NTBKtrader » Thu 06 Mar 2008, 12:45:23
pretty cool
-

NTBKtrader - Tar Sands

- Posts: 600
- Joined: Tue 19 Oct 2004, 03:00:00
Re: Copying Whales, 20% more efficient windmills?
![]() by steam_cannon » Thu 06 Mar 2008, 13:25:28
by steam_cannon » Thu 06 Mar 2008, 13:25:28
Yeah it looks cool! 
Also I think it could have a big influence on where wind power is
considered viable...

http://www.brynmawr.edu/geology/206/tomich.htm
Also I think it could have a big influence on where wind power is
considered viable...
http://www.brynmawr.edu/geology/206/tomich.htm
-
steam_cannon - Expert
- Posts: 2859
- Joined: Thu 28 Dec 2006, 04:00:00
- Location: MA
Re: Copying Whales, 20% more efficient windmills?
![]() by Tanada » Thu 06 Mar 2008, 14:01:26
by Tanada » Thu 06 Mar 2008, 14:01:26
Imagine the electricy consumed by just the ceiling and box fans used in the USA on a warm summer night. Now subtract 20% power draw from those applications.
That has to be a BIG number. Now take all the propellor driven aircraft and propellor driven boats. Reduce their energy consumption 20%.
Even if you never build a single wind turbine this is going to have HUGE implications for moving fluids with blades, or moving blades through fluids depending on the application.
$this->bbcode_second_pass_quote('Alfred Tennyson', 'W')e are not now that strength which in old days
Moved earth and heaven, that which we are, we are;
One equal temper of heroic hearts,
Made weak by time and fate, but strong in will
To strive, to seek, to find, and not to yield.
Moved earth and heaven, that which we are, we are;
One equal temper of heroic hearts,
Made weak by time and fate, but strong in will
To strive, to seek, to find, and not to yield.
- Tanada
- Site Admin

- Posts: 17094
- Joined: Thu 28 Apr 2005, 03:00:00
- Location: South West shore Lake Erie, OH, USA
Re: Copying Whales, 20% more efficient windmills?
![]() by TheDude » Thu 06 Mar 2008, 14:57:06
by TheDude » Thu 06 Mar 2008, 14:57:06
$this->bbcode_second_pass_quote('steam_cannon', '
')I've been following this technology and it's recent developments
look promising. It looks this will have a whale of an influence on the
wind turbine industry and aviation...
Thoughts?
')I've been following this technology and it's recent developments
look promising. It looks this will have a whale of an influence on the
wind turbine industry and aviation...
Thoughts?
Yeah, I hate puns!

It gets better, the president of WhalePower is Dr. Frank E. Fish - sic!
How many turbines are there in the world? You see the 74 GW installed capacity figure everywhere. Retrofitting would be awfully pricy but they say they're getting dynamite results:
$this->bbcode_second_pass_quote('', 'D')etailed results are confidential at this time but the performance was outstanding and the overall conclusions are straightforward: Tubercles work. In fact, they work better than even WhalePower insiders could have hoped.
* They dramatically enhance power at low wind speeds
* The blades operate more quietly than any previous blades
* With no stalling at the tip, tip chatter appears to be totally eliminated
* Performance in real world conditions appears to be more stable and responsive than any turbine in history. When a gust blows through, they accellerate, virtually instantaneously with no noise or other signs of instability.
WhalePower.com
Might be just the ticket for economizing micro wind.
Wondering if this has been tried before I found another article, with, God, another pun in the title: Science News for Kids: Feature: Are Propellers Fin-ished? Mostly about ship propellers.
$this->bbcode_second_pass_quote('', 'A')t the Massachusetts Institute of Technology, researchers are working on a new propulsion system for ships that mimics a penguin's flippers. Their artificial wooden flippers move a boat forward or backward by generating high-energy rings of spinning water. Other flipper movements steer the craft right, left, up, or down.
The MIT team is now testing how various flipper movements affect a boat's motion, doing experiments in giant basins of water.
The scientists envision using a pair of flippers in place of a propeller to move a boat along. More futuristic vessels could have as many as 50 flapping flippers, each one moving independently.
Cogito, ergo non satis bibivi
And let me tell you something: I dig your work.
And let me tell you something: I dig your work.
-

TheDude - Expert
- Posts: 4896
- Joined: Thu 06 Apr 2006, 03:00:00
- Location: 3 miles NW of Champoeg, Republic of Cascadia


